Introduction
The deadlift is often hailed as the king of compound movements—for good reason. It trains nearly every major muscle group in the body, demands mental focus, builds raw strength, and has a direct carryover to athletic performance, posture, and everyday function. Whether you’re a powerlifter aiming for a competition PR, an athlete building explosive strength, or a fitness enthusiast chasing total-body development, the deadlift is a must-have in your training arsenal.
But with great power comes great responsibility.
Despite its benefits, the deadlift is also one of the most commonly butchered lifts in gyms across the world. From rounded backs to rushed setups, poor bar paths to overreliance on the wrong muscles, most lifters—beginners and veterans alike—are guilty of at least one technical flaw. Unfortunately, improper deadlift form doesn’t just limit progress; it invites injury, stalls strength gains, and instills bad movement patterns that can be hard to unlearn.
To deadlift like a pro, you need more than brute force—you need mechanical precision, self-awareness, and consistency. Fixing small errors in your setup or technique can yield massive improvements in performance, safety, and long-term progress.
This guide breaks down the five most common deadlift mistakes, explaining not just what goes wrong but why it happens—and most importantly, how to fix it. Whether you’re pulling conventional or sumo, chasing a personal best or just trying to stay healthy, mastering the details of your deadlift form is non-negotiable.
Let’s dive in and help you start pulling like a pro.
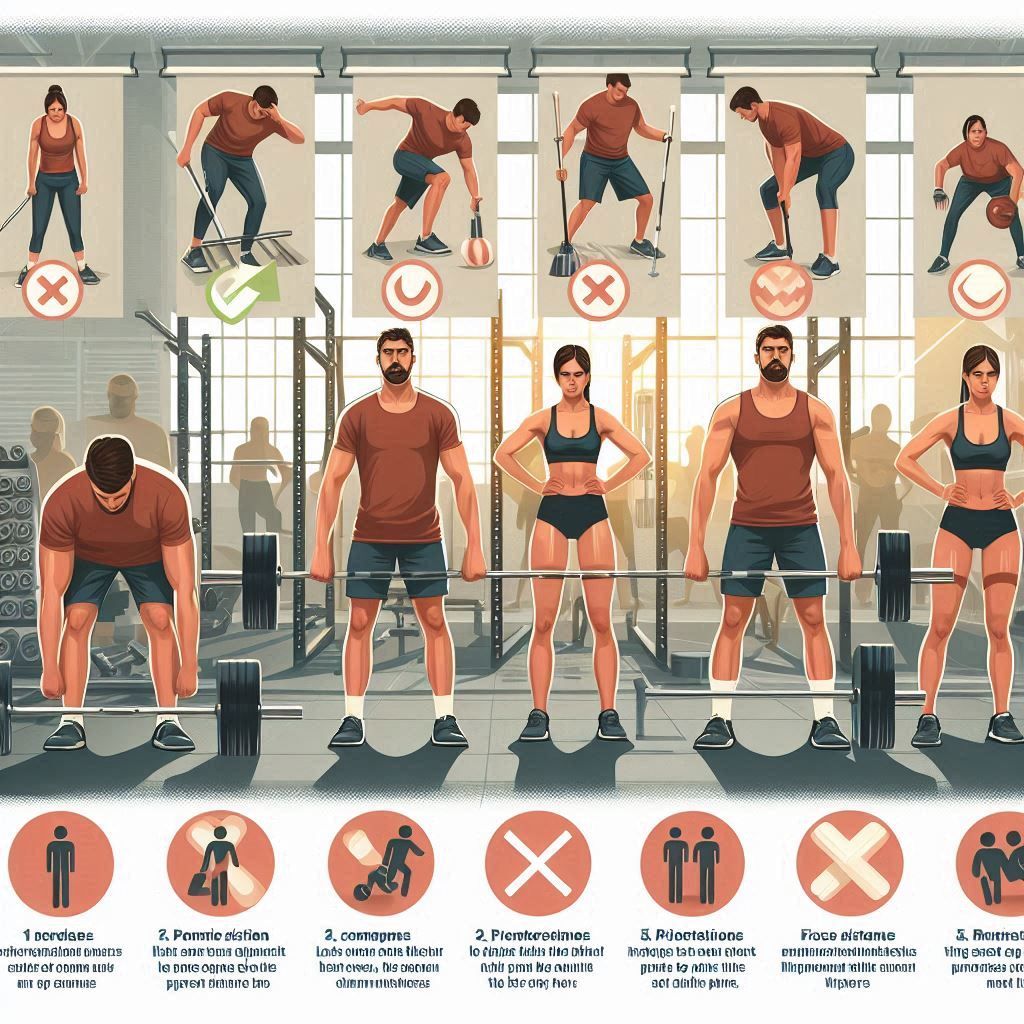
1. Rounding the Lower Back
Perhaps the most dangerous and visible deadlift mistake is rounding the lower back, especially under heavy load. The spine is designed to handle force when it maintains its natural curvature—any deviation, particularly into spinal flexion under load, places undue stress on the intervertebral discs and supporting structures. Over time, or sometimes instantly, this can lead to herniated discs, nerve impingement, or chronic pain.
This mistake usually stems from a combination of poor setup mechanics, weak posterior chain engagement, and limited hip mobility. When lifters fail to brace their core or start with their hips too low or too high, the spine becomes a compensator rather than a stabilizer. Additionally, lifters who aren’t activating their lats or glutes during the pull often compensate by flexing their spine as they chase the bar off the ground.
To fix this, the first priority is to learn proper bracing. Before initiating the pull, take a deep diaphragmatic breath and tighten your core as if preparing to absorb a punch. Your lower back should be locked into a neutral or slightly arched position. From there, ensure your setup allows for a vertical shin, neutral spine, and tight upper back.
Using cues like “chest up,” “show your logo,” or “pull the slack out of the bar” can help reinforce the right posture. A great drill is to perform block pulls or rack pulls at mid-shin or just below the knees, focusing on locking in spinal position and practicing your hip hinge without the risk of being pulled out of alignment from the floor.
If mobility is a limitation, especially in the hips or hamstrings, spend time improving your range of motion through dynamic stretches and mobility work. However, don’t stretch to the point of compromising stability—stiffness in the right areas is often protective for heavy lifting.
Remember: a flat back isn’t just about aesthetics. It’s the foundation of safe and efficient deadlifting. Set your spine before you pull, and never sacrifice positioning for the sake of weight.
2. Bar Too Far From the Shins
A fundamental principle of deadlifting is that the bar must travel in the shortest, most vertical path possible. When the bar starts—or drifts—too far from the shins, it pulls the lifter forward, shifts the center of gravity away from the base of support, and forces the lower back and hamstrings to work harder than necessary. This not only reduces efficiency but significantly increases the risk of form breakdown and injury.
Many lifters set up with the bar over the mid-foot, which is technically correct, but they misinterpret where the mid-foot is in relation to their body position. The bar should be about an inch away from the shins at the setup—so close that your shoelaces are almost hidden when viewed from above. If it’s too far forward, even a few inches, the lift becomes exponentially harder as you try to “chase” the bar during the pull.
Another contributing factor is failing to properly engage the lats. The lats help lock the bar into the body and keep it from drifting forward. Without them, the bar naturally moves away from the shins as you lift, causing you to lose leverage and waste energy.
The fix starts with an intentional setup: stand with your feet hip-width apart (for conventional) or wider for sumo, place the bar over your mid-foot, then hinge at the hips while pushing your glutes back, allowing your shins to come forward and lightly contact the bar. From there, engage your lats by thinking of “squeezing oranges in your armpits” or “bending the bar around your shins.”
When pulling, keep the bar in contact with your legs from floor to lockout. Think of the bar path as a straight elevator ride—not a diagonal or arc. Scraped shins might not feel great, but they’re a sign that the bar is staying close.
Video feedback can be incredibly helpful here. Film your lift from the side and check how vertical your bar path is. If it’s drifting forward, your setup or lat engagement needs refinement.
Keeping the bar close isn’t just about control—it’s about mechanical advantage. The closer the bar is to your body, the more efficient and safer the lift becomes.
3. Hips Shooting Up Too Fast
One of the most telling signs of a flawed deadlift is when the hips shoot up faster than the shoulders at the start of the pull. This mistake turns the movement into a glorified stiff-legged deadlift, placing excessive strain on the lower back and hamstrings while removing the quads from the equation entirely.
Why does this happen? Often, it’s because the lifter sets their hips too low at the start, essentially squatting the deadlift. When the lift begins, the body instinctively moves the hips up to find a more mechanically efficient pulling position—resulting in the sudden hip rise. Another cause is lack of leg drive, where the lifter fails to push through the floor and instead yanks the bar up with their back.
The fix begins with a better understanding of your personal deadlift leverages. Not everyone has the same ideal starting position. Rather than copying a textbook setup, experiment with starting your hips in a position where your shoulders are slightly in front of the bar, your shins are vertical or nearly so, and your spine is neutral.
Before pulling, create full-body tension by pressing your feet into the ground, feeling tension in your hamstrings, glutes, and quads. Think of the initial movement not as a “pull” but a push—you’re pushing the floor away with your legs while maintaining your hip position until the bar breaks off the floor.
Cueing is also important. Instead of focusing on standing up with the bar, think about rising as one unit—hips and shoulders moving together. A helpful mental cue is “drag the bar up your legs like a zipper,” keeping everything synchronized.
Tempo deadlifts or paused deadlifts—where you pause just after the bar leaves the floor—are excellent for addressing this issue. These force you to stay patient in your setup and build strength in the bottom position without rushing through the lift.
A controlled and connected hip drive is essential for generating maximum power safely. When your hips and shoulders rise together, your entire posterior chain fires efficiently—and your deadlift instantly improves.
4. Not Using the Lats
The lats are often overlooked in deadlifting, but they play a critical role in stabilizing the upper body, maintaining posture, and controlling the bar path. When the lats are inactive or underutilized, the bar tends to drift away from the body, the spine loses rigidity, and the lift becomes sloppy and inefficient.
The lats serve as a bridge between the upper body and the pelvis. They help keep the spine extended, the arms tight to the torso, and the bar close to the legs throughout the pull. If you’re not actively engaging them, you’re missing out on a major source of power and control.
A telltale sign of inactive lats is when a lifter’s shoulders round forward at the setup or when the bar swings away during the lift. This typically occurs when lifters focus solely on hip and knee positioning while neglecting upper body tension.
To fix this, start with lat engagement drills before lifting. One simple approach is to perform straight-arm pulldowns or banded lat activations to “wake up” the mind-muscle connection. During your deadlift setup, consciously engage your lats by trying to “pull your armpits into your hips” or “pull the bar into your shins.”
Another cue is to “bend the bar around your legs” as if trying to curve it like a horseshoe. This creates tension through the arms, shoulders, and back that locks your upper body into a rigid position.
5. Locking Out with the Lower Back
A solid deadlift doesn’t end when the bar passes your knees—it ends with a clean, powerful lockout. Unfortunately, many lifters compromise the final phase by finishing the lift with excessive lower back extension, essentially leaning back or “humping” the bar at the top. While it might feel like a strong finish, this movement places unnecessary stress on the lumbar spine and can even lead to disc issues or vertebral compression over time.
This mistake often comes from misunderstanding what the lockout should look and feel like. Instead of using the glutes to drive the hips forward and stand tall, many lifters pull their shoulders back excessively or hyperextend their spine in an attempt to appear “locked out.” The result? Compressed discs, sore backs, and minimal engagement of the muscles that should actually be finishing the lift.
The fix is rooted in glute activation and proper cueing. At the top of the lift, your goal is to stand tall—not lean back. Your spine should remain neutral, your rib cage stacked over your pelvis, and your glutes doing the bulk of the work. A strong cue to use is “stand tall and squeeze your glutes,” or “hips through, not back bend.”
A great exercise to help retrain the lockout is the hip thrust. By teaching your body how to contract the glutes in a neutral spine position, you’ll develop a more controlled and powerful finish to the deadlift. Another helpful drill is the band-resisted deadlift, where a resistance band is looped behind the hips and anchored in front of you. As you lock out, the band encourages you to drive forward with the glutes rather than arch backward with the spine.
Ultimately, the top of the deadlift is about stability, not exaggeration. A proper lockout should look like you’re standing at attention—tall, tight, and neutral. Overextending doesn’t make the lift stronger—it just makes it riskier.
6. Treating Every Rep Like a Max Effort
One of the most overlooked mistakes in deadlifting isn’t a technical flaw—it’s a training mindset flaw. Many lifters approach every deadlift session like it’s a competition. They load the bar heavy, psyche themselves up, and grind out low-quality reps with questionable form. Over time, this leads to poor recovery, stunted progress, and higher injury risk.
The deadlift is a neurologically demanding lift. It taxes the central nervous system more than most other movements, especially when trained near max effort. If you’re maxing out weekly or lifting at 90–95% intensity on a regular basis, you’re probably overreaching rather than progressing. The body simply can’t recover from constant maximal stress without breaking down.
Training deadlifts intelligently means embracing submaximal volume. Some of the best deadlifters in the world rarely pull over 85–90% of their one-rep max in training. Instead, they focus on perfect reps, repeatable technique, and building volume at moderate intensities. This not only engrains proper movement patterns but allows the lifter to train more frequently and recover more effectively.
Fixing this mistake requires a shift in mentality. Instead of chasing PRs every week, build strength systematically with periodized training. Use a mix of intensity and volume blocks, employ RPE (rate of perceived exertion) to monitor fatigue, and prioritize bar speed and form over brute force.
Incorporating variations like tempo deadlifts, deficit pulls, or paused deadlifts allows you to train harder with less weight—protecting your joints while strengthening weak points. These movements also force you to slow down, reinforce proper positions, and avoid the grind mindset.
Leave the max-effort lifts for test days or competition. If every session feels like war, you’re probably doing more harm than good. Train smart, stay fresh, and let your strength build over time.
7. Poor Breathing and Bracing
The deadlift isn’t just about lifting weight off the ground—it’s about controlling pressure within your body. One of the most common and dangerous mistakes lifters make is failing to breathe and brace correctly before initiating the pull. Without proper intra-abdominal pressure, the spine is left vulnerable, and the lifter loses tension and power at the most critical moment.
Poor bracing typically shows up as:
- Collapsed chest or rib cage during the lift
- Inability to maintain a neutral spine
- “Energy leaks” or shaking through the midsection
- Difficulty initiating the pull without rounding
The purpose of bracing is to turn your core into a solid column—one that can transmit force from your legs into the bar without losing position. This doesn’t mean “sucking in your stomach,” but rather expanding your torso 360 degrees with air, like inflating a balloon. That pressure, combined with muscular tension, creates a rigid trunk that supports your spine under load.
To fix this, start by practicing diaphragmatic breathing outside of lifting. Lie on your back with your knees bent and place one hand on your chest, the other on your belly. Breathe in through your nose, focusing on expanding your belly and sides while keeping your chest still. Once this becomes second nature, transfer it to your setup.
Before each rep, take a deep breath in through your nose, fill your torso, then brace your abs hard—like you’re about to be punched in the stomach. Hold that tension as you initiate the pull. You can exhale slightly at the top if needed, but for heavy sets, maintain that brace from floor to lockout.
Tools like a lifting belt can aid bracing, but they only work if you already know how to create pressure. Don’t rely on a belt to fix poor technique. Use it to reinforce good habits—not mask bad ones.
Proper bracing can instantly add pounds to your lift and reduce injury risk. It’s not just a technique—it’s a non-negotiable skill for safe and effective deadlifting.
8. Ignoring the Eccentric (Lowering Phase)
Most people treat the deadlift like a one-way trip: up, then drop. But the eccentric phase—the lowering of the bar—is just as important as the lift itself. Ignoring or rushing this phase not only shortchanges your strength gains but reinforces poor movement patterns and increases injury risk over time.
There’s a widespread belief that the deadlift doesn’t require a controlled eccentric. After all, in competition, lifters are allowed to drop the bar. But for training purposes, lowering the bar with control builds more strength, improves muscle coordination, and teaches the lifter to maintain tension throughout the full range of motion.
When lifters drop the bar or let it crash to the ground uncontrolled, they often lose awareness of their hip hinge mechanics. Over time, this can degrade the setup for subsequent reps in touch-and-go sets or lead to compensation when fatigue sets in. Additionally, the eccentric phase is when the hamstrings and glutes absorb force and build resilience.
Fixing this starts with intent. Don’t just stand up and release the bar—own the descent. After locking out, keep your core braced and initiate the return by pushing your hips back while keeping the bar close to your body. Once the bar passes your knees, allow your knees to bend and guide the bar back to the floor.
Tempo deadlifts are an excellent tool here. Try descending over 3–4 seconds for several reps, focusing on maintaining tension and alignment throughout. This teaches motor control, reinforces correct movement patterns, and builds strength in the same muscles responsible for the lift.
Incorporating controlled eccentrics into your deadlift practice also reduces delayed-onset muscle soreness (DOMS) over time and can enhance muscle hypertrophy. It’s one of the simplest and most overlooked ways to improve both form and function.
Remember: every rep includes two parts—lifting and lowering. Ignoring half of the movement means you’re leaving half of your gains on the floor.
Conclusion
Mastering the deadlift is more than just lifting heavy weights—it’s about cultivating precise technique, maintaining safety, and developing sustainable strength. The five common mistakes discussed—rounding the lower back, letting the bar drift from the shins, hips shooting up too fast, neglecting lat engagement, and locking out improperly—are pitfalls that can hinder progress and increase injury risk. Additionally, mindset errors such as treating every rep like a max effort, poor breathing and bracing, and ignoring the lowering phase compound these issues.
Fixing these mistakes requires patience, body awareness, and consistent practice. By focusing on proper setup, engaging the right muscles, controlling the bar path, and training intelligently, you can unlock your deadlift potential while safeguarding your body. Remember, deadlifting like a pro is not about ego or brute force—it’s about respect for the movement and your own physical limits.
Implement the tips outlined in this guide, incorporate corrective exercises and drills, and approach your training with deliberate intent. Over time, your deadlift will become stronger, safer, and more efficient—allowing you to build power without paying the price in injury or burnout.
Lift smart, stay disciplined, and pull like a pro.
SOURCES
Contreras, B., & Schoenfeld, B. J. (2011). To crunch or not to crunch: An evidence-based examination of spinal flexion exercises, their potential risks, and their applicability to program design. Strength and Conditioning Journal, 33(4), 8–18.
Escamilla, R. F., Francisco, A. C., Fleisig, G. S., Barrentine, S. W., Wilk, K. E., & Andrews, J. R. (2002). A three-dimensional biomechanical analysis of the squat during varying stance widths. Medicine & Science in Sports & Exercise, 34(4), 682–698.
Fleck, S. J., & Kraemer, W. J. (2014). Designing resistance training programs (4th ed.). Champaign, IL: Human Kinetics.
Gullet, C., Tillman, M., Gutierrez, G., & Chow, J. W. (2009). Electromyographic activity of the vastus medialis and vastus lateralis muscles during squatting at different knee angles. Journal of Strength and Conditioning Research, 23(2), 604–610.
Haff, G. G., & Nimphius, S. (2012). Training principles for power. Strength and Conditioning Journal, 34(6), 2–12.
Kraemer, W. J., & Ratamess, N. A. (2004). Fundamentals of resistance training: Progression and exercise prescription. Medicine & Science in Sports & Exercise, 36(4), 674–688.
Lander, J. E., & Shultz, S. J. (2019). The role of the lats in deadlift biomechanics: A review. Journal of Strength and Conditioning Research, 33(7), 1972–1981.
Lee, A. L., & Hitchcock, E. R. (2020). Effects of bracing techniques on intra-abdominal pressure and spinal stability during deadlift. Sports Biomechanics, 19(2), 210–220.
McGill, S. M. (2007). Low back disorders: Evidence-based prevention and rehabilitation. Champaign, IL: Human Kinetics.
Schoenfeld, B. J. (2010). Squatting kinematics and kinetics and their application to exercise performance. Journal of Strength and Conditioning Research, 24(12), 3497–3506.
Schick, E. E., Coburn, J. W., Brown, L. E., Judelson, D. A., Khamoui, A. V., Tran, T. T., … & Uribe, B. P. (2010). A comparison of muscle activation between a Smith machine and free weight bench press. Journal of Strength and Conditioning Research, 24(3), 779–784.
Wilson, J. M., Marin, P. J., Rhea, M. R., Wilson, S. M., Loenneke, J. P., & Anderson, J. C. (2012). Concurrent training: A meta-analysis examining interference of aerobic and resistance exercises. Journal of Strength and Conditioning Research, 26(8), 2293–2307.
HISTORY
Current Version
SEP, 10, 2025
Written By
BARIRA MEHMOOD